Two Roads in a Cyber Forest
Note: This is a longer post than normal, but if you are here looking for advice on setting up a working desktop on stock FreeBSD, read on.
Project Trident’s 2020 Vision
A few weeks ago, the developers at Project Trident, the excellent BSD desktop featuring the Lumina window manager, decided to move to another operating system platform. They made the decision for a variety of reasons that I won’t recount here. The new OS base will be Void Linux, notably called the most BSD-like of the Linux versions they surveyed.
On the one hand, I’m happy to see project make progress- there will be a lot more development on the project and there will be a new suite of capabilities that unfortunately have not made it into FreeBSD and downstream to TrueOS, the current Trident base operating system.
On the other hand, it’s sad that the project will leave the BSD fold after so many years. There was a lot of angst in the Telegram channel, and some on various IRC channels. Some people are mad, some are sad, and some feel had - they just migrated from Linux to BSD and the project is turning around and heading back the other way.
I’ve spent too many years using BSD to give it up, so I’m returning to the DIY path that almost everyone who has ever tried to put a GUI on FreeBSD remembers- those painful years of manual X Window configuration, graphics drivers, screens, window managers, and getting applications to run all while not destroying your CRT monitor with the wrong mode settings. Welcome back to the 1990’s. But, well… let’s just get on with it.

Below, I’ve detailed the steps I’ve taken to set up my own desktop on stock FreeBSD 12 - currently at 12.1-RC2.
Note: while these steps work for me, they may not work for you. Your hardware and drivers might be different. I can’t troubleshoot your hardware or your X configuration, so please use this overview as a guide, not a foolproof installation manual.
My general plan is to use:
- Stock FreeBSD (currently at 12.1-RC2)
- Stock FreeBSD Xorg package
- LXQT + OpenBox
- Various Freedesktop bit and pieces
The applications that I normally have on my desktop include:
- Firefox
- Chromium
- Midori
- Falkon
- Hexchat
- Telegram Desktop
- Claws email
- VLC media player
- Gimp
- LibreOffice
- qpdfview
- Wireshark
and a few more. If I can get these installed and functional, that will be enough for now.
Here are the steps I’ve taken so far:
- On my existing Trident PC, I created a tarball of some files that I will use on the new system:
tar cvf migrate.tar /boot/loader.conf /usr/local/etc/X11 /etc/ip6addrctl.conf /etc/rc.local
This file will be transferred over to the new system once it’s up and running.
-
Downloaded FreeBSD. I’m using 12.1-RC2 to start.
-
Wrote the .iso to a USB stick. I’m using da0 below. Your USB device might be different. Also note- this COMPLETELY OVERWRITES the USB stick.
gpart destroy -F da0
gpart create -s GPT da0
dd if=FreeBSD-12.1-RC2-amd64-dvd1.iso of=/dev/da0 bs=1M
- I put the bootable USB stick in my test machine and booted into the FreeBSD installer, taking almost all defaults except for:
- Selected ‘Auto ZFS’ on the ‘Partitioning’ page
- Did not add any IPv6 configuration during ‘Network Configuration’
- Specified my timezone as ‘EDT’
- Added ‘moused’, ’ntpdate’, and ’ntpd’ on ‘System Configuration’
- Selected ‘random_pid’, ‘clear_tmp’, and ‘disable_sendmail’ on ‘System Hardening’
- Added a user, and made sure the user is in the
wheelgroup.
-
On reboot, I logged in as root and ensured that networking is set up correctly. I pinged
pkg.freebsd.orgto be sure. -
Next, I installed a standalone package such as
zip. This has the effect of installing the latest version of the package manager, as well as ensuring the package repository is ready to go. -
I then installed a bunch of packages. Note that installing some packages can have side effects on your system, such as installing new users, or playing with groups. If you want to keep a record of what’s going on, run the script(1) command before loading packages. The output file
typescriptwill contain all the gory details. If you don’t care, you can skip the script command and its corresponding exit below:
script
pkg install xorg lxqt fvwm-crystal lxde-meta qemu virtualbox-ose virtualbox-ose-additions firefox falkon
exit
These packages weigh in at about 4GB. You can skip the fvwm-crystal, lxde-meta, qemu, and virtualbox* packages,
install them later, or not at all- it’s up to you.
- Firefox and several other programs need the file
/etc/machine-id, which contains a unique ID for the new machine.
uuidgen | tr -d '-' > /etc/machine-id
- A number of kernel modules need to be loaded. Some are loaded at boot, and some can be loaded later during startup. I put the following in /boot/loader.conf.local. You may not need all these modules, particularly all the sound modules. Experiment to see what you actually need.
# File:  /boot/loader.conf.local
kern.geom.label.disk_ident.enable="0"
kern.geom.label.gptid.enable="0"
opensolaris_load="YES"
zfs_load="YES"
# Enter addition modules below
crypto_load="YES"
aesni_load="YES"
geom_eli_load="YES"
# Tune ZFS Arc Size - Change to adjust memory used for disk cache
vfs.zfs.arc_max="512M"
zfs_load="YES"
snd_uaudio_load="YES"
tmpfs_load="YES"
geom_eli_load="YES"
libiconv_load="YES"
libmchain_load="YES"
msdosfs_iconv_load="YES"
cuse_load="YES"
geom_uzip_load="YES"
fdescfs_load="YES"
acpi_video_load="YES"
atp_load="YES"
snd_driver_load="YES"
snd_ad1816_load="YES"
snd_als4000_load="YES"
snd_atiixp_load="YES"
snd_cs4281_load="YES"
snd_ds1_load="YES"
snd_envy24_load="YES"
snd_spicds_load="YES"
snd_envy24ht_load="YES"
snd_ess_load="YES"
snd_sbc_load="YES"
snd_fm801_load="YES"
snd_mss_load="YES"
snd_maestro_load="YES"
snd_maestro3_load="YES"
snd_neomagic_load="YES"
snd_sb16_load="YES"
snd_sb8_load="YES"
snd_solo_load="YES"
snd_t4dwave_load="YES"
snd_via82c686_load="YES"
snd_vibes_load="YES"
vboxdrv_load="YES"
autofs_load="YES"
drm_load="YES"
vboxnetflt_load="YES"
vboxnetadp_load="YES"
- My graphics driver is
i915kms.ko. I found that it would not load during the boot sequence, so I put it in /etc/rc.local:
#!/bin/sh

# jpb - added to start essential locals

echo "rc.local"

# The screen may change modes at this step.
echo "loading Intel driver"
kldload i915kms
- Next, I copied the
migrate.tarfile from the working Trident system to the new FreeBSD system. I untarred the file, using the -C option to jump to the root directory before extracting:
tar -C / -xvf migrate.tar
This should place all the files from the Trident system in the correct place on the new system. Note that at this point, you have all the packages installed, and the system files ready to go. Time for a reboot, to get all the kernel modules loaded including the graphics driver:
reboot
Keep an eye out for any errors at this step and fix anything that looks wrong.
- One or more of the packages installed earlier installed
sudoas a dependency. It’s quite handy to be able to use sudo for various operations. The easiest way to get the default user (who is already in the wheel group) to be able to use sudo is to uncomment the following line in the /usr/local/etc/sudoers file (or add a separate entry in /usr/local/etc/sudoers.d/).
## Uncomment next line to allow members of group wheel to execute any command
%wheel ALL=(ALL) ALL
- It’s time to log in as a regular user and get the
.xinitrcfile ready to go. To get started, I used thetwmwindow manager - it’s self-contained and reliable. I edited the .xinitrc in my home directory:
# File: $HOME/.xinitrc
xterm &
twm
There is no ampersand after twm. You want the window
manager to run until you exit it, which will return you
to the console.
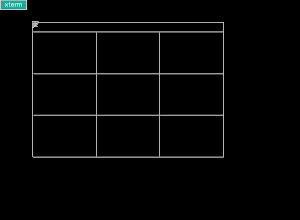
- OK, let ’er rip:
startx
If all goes well, you should see something like the figures
below:
- If you desire to have a session manager, try installing sddm:
pkg install sddm
You will have to insert sddm_enable=“YES”, and in some cases dbus_enable=“YES”, in /etc/rc.conf. The session manager should work on a reboot.
That’s about it for now. I’m sure I’ll be updating this post in the future, making some additions and corrections. Check back here occasionally if you think it might help you.
If you spot a mistake or have a suggestion, toss me a note. Check the Contact tab above for my email address. – Jim B.
Update: Oct 31, 2019
If you are having problems removing the “red exclamation mark” on your icons (see image above), read on.
The “desktop” in the LXQT desktop is really an instance of the
pcmanfm-qt filemanager, spread across the entire visible
display window. It has a --desktop option that causes
it to be the default manager of icons on the desktop.
The problem (feature†) is that the pcmanfm-qt program considers any icon on the desktop to be “untrusted” by default, and it arranges for that icon to be displayed with the red exclamation mark overlaid. These can also be seen if you start pcmanfm-qt up yourself (“Menu->Accessories->PCMANFM-Qt File Manager”) and open the “Desktop” folder.
To fix this condition, two things must be done-
-
Adjust a setting in pcmanfm-qt and restart it, and
-
Right click on each icon and adjust the trust setting for the icon.
It’s important to get the order correct because if you don’t, the red exclamation marks show up again after a reboot which may cause you to start losing hair.
Here’s the procedure I followed.
-
Start pcmanfm-qt from the main menu “Menu->
-
Click to “Edit->Preferences” where you will see an option named Launch executable files without prompt, as shown below.
- The Preferences window will announce that an application restart is needed in order for the changes to take effect:
- You now need to close the instance of pcmanfm-qt that is performing the display desktop management. In a terminal window you can just type killall pcmanfm-qt as shown below. Once the command executes it kills the managing instance and the background display goes black as shown below. Note however, that the LXQT panel still works, and the terminal window still works.
- Start the desktop managing instance again with the command:
pcmanfm-qt --desktop --profile=lxqt >/dev/null 2>&1 &
which puts all the command output to /dev/null.
-
You should now be able to right click on each icon and check “Trust this executable” as explained above.
-
Finally, carefully shut down the system (using the “Menu->Leave->Logout” option) and restart the system. The desktop icons should be bright and shiny, without any red exclamation marks.
Update: Nov 10, 2019
Turns out, LXDE is a bit more trouble that it’s worth, so I’m opting for XFCE instead. It’s a mature desktop, actively maintained, with a number of really good features. Check the documentaion at https://www.xfce.org
No more updates on this page.
– Jim B.